Monday, July 15, 2013

Adaptive Art: Clay Wind Chimes

 I found a lesson in an art book on how to create clay wind chimes. The lesson was about pressing found objects into the clay to create texture prints. I wanted my Lifeskills class to make these, but I wanted these to be apart of themselves. Almost like the Kindergarten clay pendants are, with the student's pressing their shoe print into the clay. 

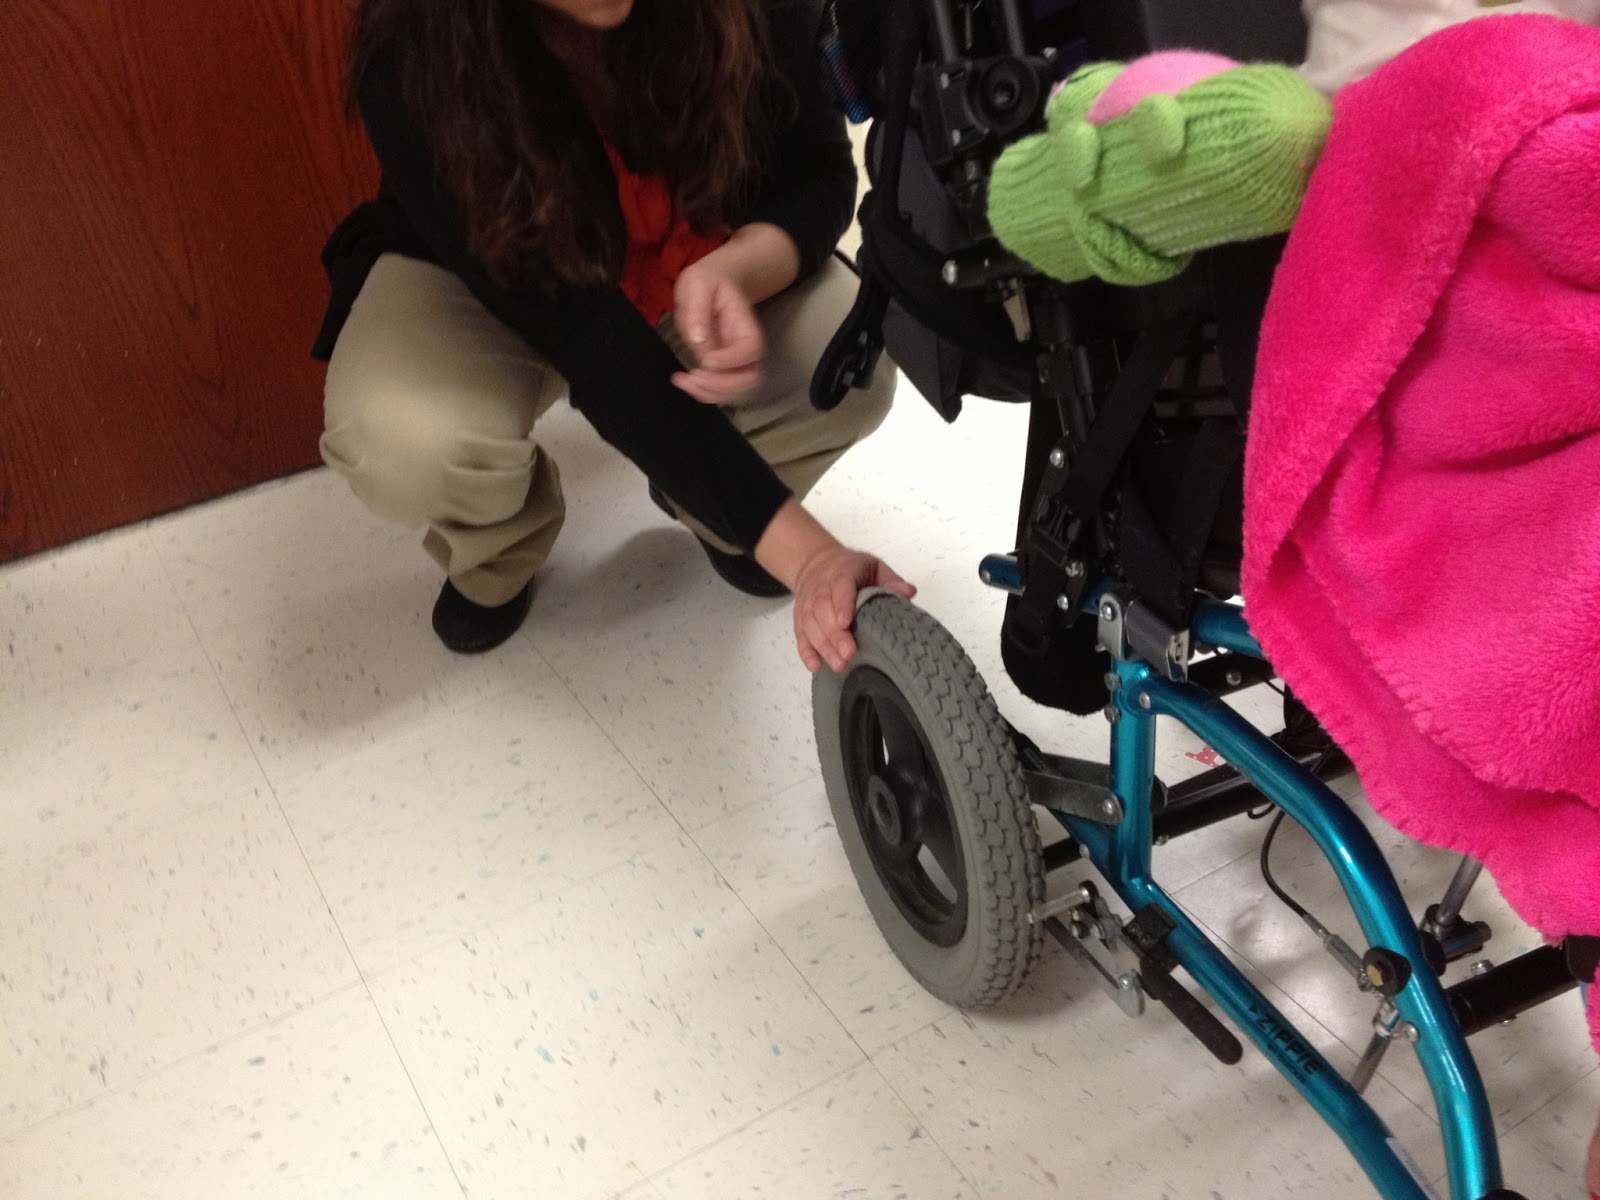
So therefore we used their wheelchairs for the printing. Myself and their teachers pressed the clay onto the wheels and anything else we could find on the chair that we thought would print, and also printed their shoes.  One teacher assistant actually printed a student's fingers into the clay. We also used objects and with hand over hand pressed designs into the clay. 

I think they turned out beautiful! I was very proud of these and excited when they took them home to share with their families. 

The clay is white and was fires at cone 04. Myself and teacher helpers glazed with a low fire glaze with one good coat, and with a wet sponge wiped surface off to give a nice contrast. Textures really popped! I glazed fired at cone 05. 

Thick jute cord was used to connect all clay pieces. 


 Great tire print

 I hung all up in the display case at school with photos of what we did. 


Sunday, July 14, 2013

QR Me!

 This year I did a technology project with one fifth grade class that was participating in pilot program with Chrome Books. This particular class had books for everyone in the class to use all year long. each student had their very own Weebly site where they upload classroom projects, pictures etc. 

 I became very interested in creating an art lesson using QR codes, and asked my technology facilitator to help me out. 
Day 1: Was to take photos using IPads of all their art projects that they had finished so far. I borrowed eight IPads from the lab and each table shared one. They immediately emailed these photos to themselves (each student also has an email address) This took the entire class
Day 2: Students brought in their Chrome Books and students (under instruction from our tech facilitator) was to create an art page on their Weebly site. They could call it anything, "My Art", "Art By Me", "My Art Portfolio", etc. Their choice. Next they uploaded their photos on to their sites on this art page. This took entire class. 
 Artist Statement. using Chrome Books again, they were to also include an artist statement on their art page. I had instructions on board on how to do so. See below for instructions. This took forever!
Day 4: Finish artist statement and create an QR code. We used a free website for this. They basically cut and pasted their URL and a code was generated for them. I later printed these for the following week. 
Day 5: Self portrait. I did a real quick lesson on bodies and figure drawing and student drew themselves with the code as their heads. They could either use crayons, markers, or colored pencils for color. They were to be cut out by end of class. A lot had to stay over time and finish. 
I took these home and literally scanned these on my IPhone and a free barcode app and graded on back. About 4 out of class never worked out (they did not copy and paste the correct URL when created the code) 
Nevertheless I hung all up and the staff and students had a kick out of looking at them. A few staff members and parents scanned to see what they were all about. I wish with time and resources I would have picked some classes and checked out the IPads for a little field trip down the halls. But I ran out of time. Next time I will!

 Artist Statement instructions
 Reflection: Of course I learned a lot about this lesson. It was hard. We ran into a lot of issues, ex. two students were mainstreamed in that class and did not have Chrome Books. So they took their photos and I uploaded those onto my school website. Their QR was directed to my site where I uploaded their photos.
 I hope next year to do this again, but to make it easier just create a code their weebly site and skip the art page and art photos. Just create the QR code in art class and portrait?????


Monday, March 11, 2013

Clay, Clay, Clay

Third Grade cupcakes

Second Grade slab bowls. They are upside down over a hump mold (styro foam bowl) student stamped texture on these slabs, which you can not see. After bisque fire we will glaze and melt glass in these. 

Fifth Grade coil pottery
All my classes are doing clay right now, well except for Kindergarten. I know I am crazy. Here are some green ware examples on the kiln cart, drying slowly under plastic. I opened it up and took a pic. Fourth grade started today face pottery, those are GREAT too. I'll include later.

Tint and Shade with a Cherry on Top!


This is my second year doing this lesson. It is so great for teaching tint and shade, which I do in First Grade. It was tough to do in two class times. So maybe three, and add a little Wayne Thiebaud? First day students mixed their values. Two tints and two shades, and also the original color. The next week we did a review, and introduction to a value scale on smart board. They cut and glued their scoops on top of a cone to create a value scale. Last were the toppings. Sprinkles, whipped cream, chocolate sauce, and fruit on top!

I did this lesson last year too! Better bulletin board then :)

Thursday, February 21, 2013

What's been going on the art room in February!

I take tons of photos on my phone during class! However getting them to my blog is another story. Here are some  super fun things some grade levels have been working on the past couple of weeks.

Fourth Grade: Circke Weaving on coat hanger. A NEW WEAVING PROJECT FOR ME! Great idea from Mrs. Picasso's Art Room. Her blog has a great directions on how to make the loom and get started. 
Don't let the pink shirt fool you. This is boy! He and few more fourth grade boys have  proven to be my best and fastest weavers!
Two classes hung on wall waiting.....to be worked on. Not done yet. Great way  to store  in between class times. Kids just pick them up as they walk into room. 
First Grade student working on Clay heart. This lesson was on Jim Dine. These are done actually. Ill post finished pics later. 
Add caption


Third Grade Gyotaku lesson. Student's inking and rubbing their fish. These are done too. More pics to come soon. 


Second Grade Japanese Bridges. These student's are dabbing away with quick  prints to capture Monet's brush style. One more day to wrap these up! Ill post more finished pics later. 


Kindergarten's Cool Jellies!

MOST ADORABLE LESSON YET!!!
In Kindergarten we are learning all about color.
We have already discussed warm colors with  our scribble sun  lesson and I wanted to do a lesson on cool colors as well. I found this lesson on Pinterest, from Mrs. Knight's Smartest Artists blog. This lesson took three class times. I really wanted it to take two but it was just too much. I decided to let my time line go and just let the kids take their time with cutting and punching holes. It was worth the wait.

First Day
Discussion of cool colors, what they are, what that means, and examples on works of art.
Cool wavy painted lines

Second Day: Book
"I'm the best artist in the Ocean" by Kevin Scherry
cut semi oval for jelly fish body and use scrapbook scissors and hole punchers for legs/glue on paintings. This took forever! Kids had difficult time with punchers but got the hang of it. They rallied through it!  This part carried us into the next class time.

Third Day:
Smart board activity. Where kids had to sort and drag colors into warm and cool groups.
Finish up legs, the more the better. Eyes with white pre cut circles (i made from my cricut) and hole punched eye balls. A mouth, name in back ground and stamped light blue bubbles from the top of a cup. 
As you can see some of these are without a mouth! One or two classes I just ran out of time at the end of class and we left them so. No problem...still super cute. 


This one looks as if he is floating!


One of my favorites. This one is hung outside my class room  door in a frame. 
Adorable!


Scrap book scissors and hole punchers! This little girl below is actually cutting a zig zag on her own! You go girl!


Tuesday, February 12, 2013

Color Wheel Cows

Third Grade lesson where student's learned about the life and art of Peter Diem. We discusses how he experimented with  his paintings and student's watched a short video clip of Diem painting.

We experimented with color by using the primarys to create the secondarys and intermediates.

This lesson for me was inspired by other art teacher bloggers, such as Kids Artists,http://kidsartists.blogspot.com/2011/01/colourful-cows-like-peter-diem.html and Panther's Palhttp://pantherspalette.blogspot.com/2011/04/3rd-grade-peter-diem-cow-paintings.htmlette   . Great lesson color mixing and abstract art!! I have tons to great student examples I need to post as well. Total success!