Saturday, July 16, 2011

Water Color Jelly Fish


This is such a great water color lesson to do at the end of the school year. I did it with second graders, and they loved it. I was actually at the beach this past week and saw several jelly fish and thought about this lesson and had to come home and blog about it.


This lesson can be done in a 40 minute class.


I borrowed this lesson from http://www.deepsparkle.com/. She actually has a video you can watch of the lesson.


Materials:


Water color, we used liquid watercolor


Jars of water


meduim to small brushes


White heavy drawing paper


oil pastels


I began the lesson talking about jelly fish and their shape. I actually drew this on the board. Curved at the top and wavy at the bottom. The inside of this shape was to be painted with lots of water color, puddles inside. Then they were to hold the paper up and watch the paint drip down to the bottom. Note: have something underneath to catch the water color. Some times it took at bit of tapping of the paper to make the watercolor run.


Student were asked to paint 4 or 5 jelly fish on their paper. I demonstrated how to stagger the fish to fit all on the paper.
Next: after all fish are on the paper using a small fish paint more tenticles down to the bottom of the paper to make the drips that were made. It is fine if the paint mixes a little. This adds creativity. See below 
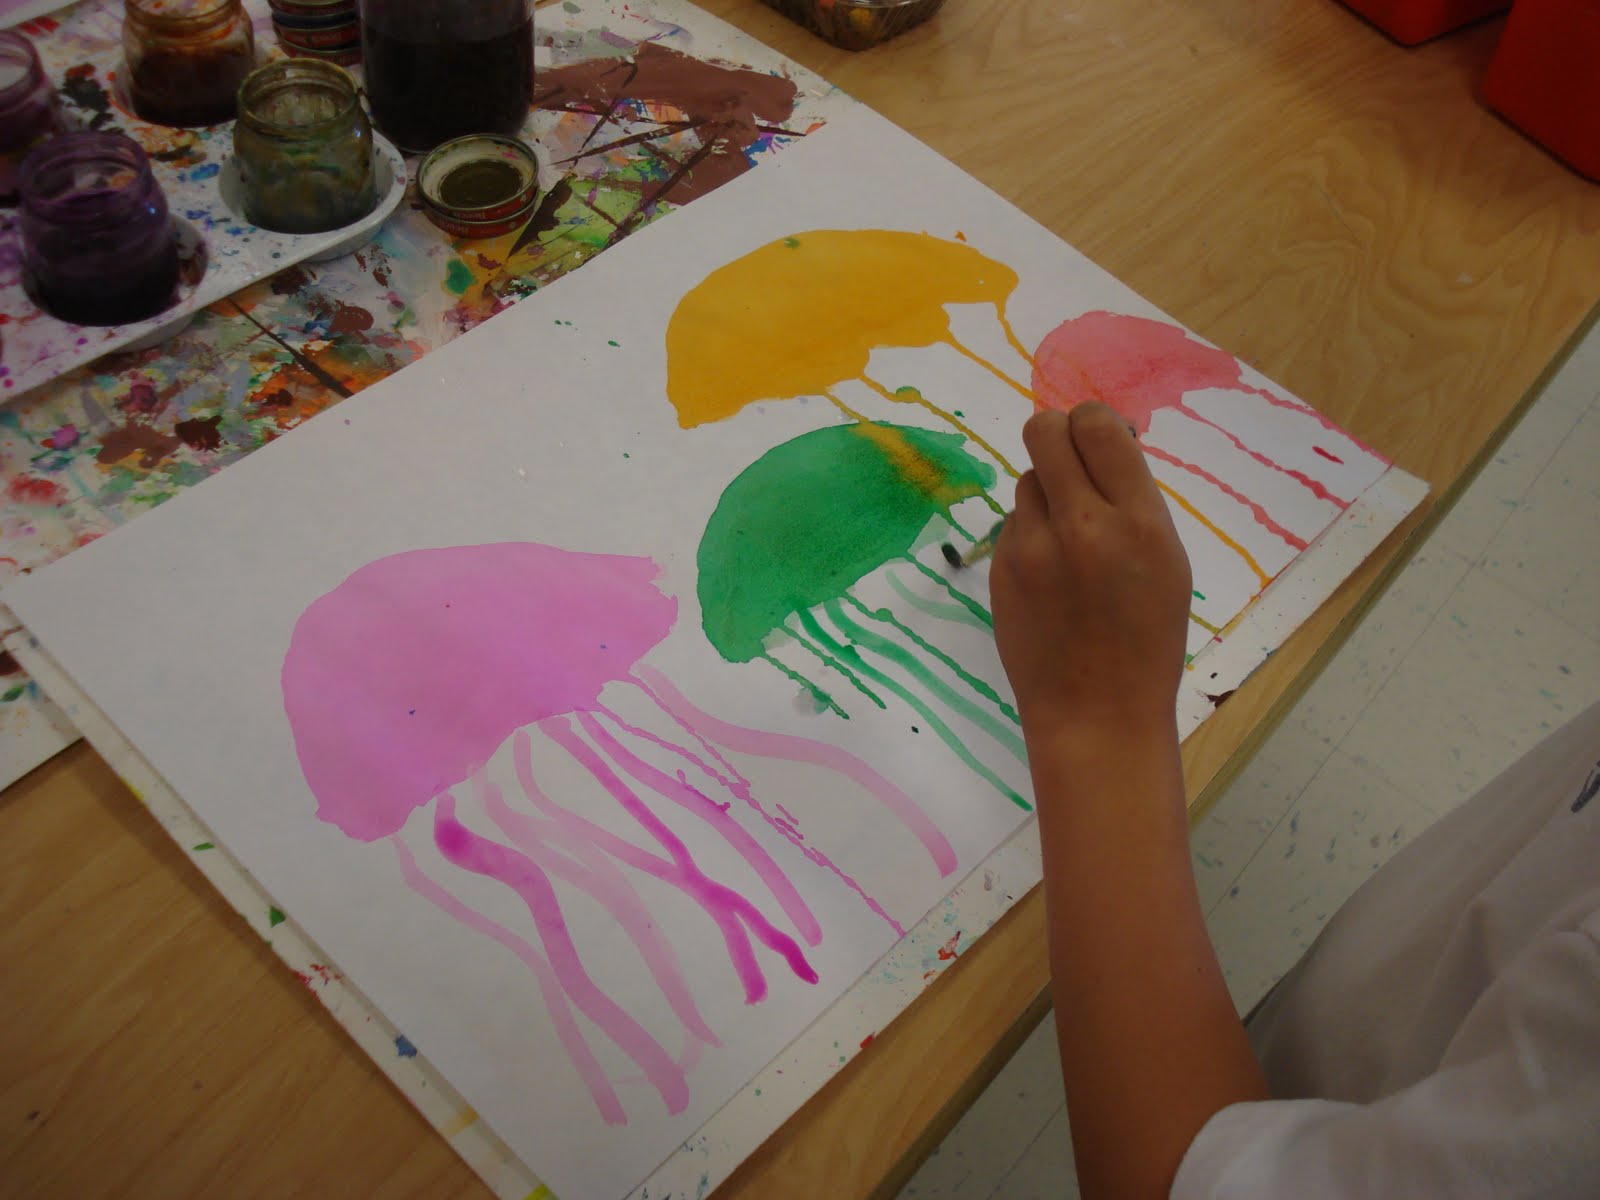
Next BUBBLES. Dip brush is water color, wip and tap, tap , tap specks on the paper. travel around the paper with these. Use different colors. For the final step wait a couple of minutes for paint to dry. Using oil pastels draw more tenticles lightly. If the jelly fish is green use a green pastel. See below

Thursday, June 16, 2011

Kinder Self Portraits

This is such a great lesson because it teaches several important concepts . It takes about 3-4 days to complete but it is worth it.


The emphasis at Kindergarten is on:


Personal experience and/or imagination
Exploring a variety of media to develop fine and gross motor skills
Learning care and use of tools and equipment
Following safety rules
Family, five senses, counting, and retelling stories in pictures
Learning about a variety of artists and art forms, including architecture
Art elements - color, shape and line


These concepts are taught with this portrait lesson:


  • explore a variety of media


  • Create a variety of lines, like thick and thin, curved or zigzag, etc.


  • Cut large and small shapes; double layers to produce identical shapesng a variety of media


  • create orginial pictures of self


This mixed media lesson was orginally inspired from a lesson on Deep Space Sparkle. I have added my own ideas and even incorporated the story "I Aint Gonna Paint No More". This is great story to end the year with. However I do encourage my students to stay creative and paint over the summer.


NOTE: the handprints were very difficult and messy for my kinders. You'll notice alot with missing fingers. Which is kinda cute. I will think of something different for next year


Materials Day 1:


  • Prints of self portraits from famous artists. We looked at Van Gogh's, Rembrandts, Henri Rousseaus


  • Oval template


  • one sheet of skin colored paper. Students chose their own.


  • white paper


  • pencils, glue, scissors


    Lesson: Day 1


  • discuss what self portriat is. Look and discuss prints.


  • Students trace their own oval and cut, on same paper draw and cut out a rectangle for the neck. Glue those on in middle of paper


  • Take scrap from that paper fold and draw shape for ear. We drew a D. Students cut with paper folded to make two identical shapes. Glue


  • Same with white paper. fold paper, draw oval, and cut to make two shapes. Glue


THIS TAKES THE ENTIRE 40 MINUTES


Day 2


  • We used mirrors to look at our faces to see the colors, shapes and lines of our features.


  • Using markers draw eyes, nose and mouth


  • I cut different colors of yarn such as light yellow, bright yellow, dark brown, light brown, black, reddish-brown. Students chose some pieces that best matched their hair. The mirrors were helpful for this.


  • WHILE THEY COMPLETED THE FIRST STEPS I WENT AROUND AND ADDED THE GLUE TO FORM THE SHAPE OF THEIR HAIR.


  • they laid the yarn down neatly in the glue


Day 3


  • paint for the shoulders/shirts. See my great technique for paint in the kindergarten still life post.


  • brush prints for the back ground


  • hand prints on piece of construction paper


DAY 4:


  • Story "I aint gonna paint no more"


  • cut out hand prints and glue at bottom. Really focus on having a left and right hand in art work. I told my students to have the thumbs face in as if pointing to the chin.


  • This class used buttons on the shirt. It added a nice touch

Wednesday, June 15, 2011

Mixed Media African Masks

This lesson was inspired from the book "Dynamic ART Projects for Children". I really like this book and used several lessons from it this year.


Slab Boxes

These Clay boxes were spectacular. My only regret was to not take more example photos. This lesson was awesome because it covered so many clay concepts such as


  • slab building


  • scoring


  • slipping


  • glazing


I did this lesson in three classes. Two were for building and the other for glazing.

Materials:


  • Masonite boar


  • Slab sticks


  • needle tool


  • slab roller


  • Jar of slip


  • Clay


  • glaze ( I used speed ball low fire glazes)


  • optional: square template
Excellent photo showing how to score. This slab for the bottom of the box was measured and cut first.


I reminded the students the three basic "S" rule when building with clay. 1) score 2) slip and 3) smush together.


After the walls of the box were put together seams of slab were to be smoothed.


Measuring additional slab for lid


Students were challenged to come up with an interesting handle for their box.


I seperated boxes from lids with paper towels until they were bone dry.


Monday, May 23, 2011

Third Grade Symmetrical Masks

Third Graders really liked this lesson. The first day we discussed What are masks used for? Why are masks worn? Who wears them? What stories can masks tell us? Students looked at a power point of masks around the world and they first made a sketch of a symmetrical mask.

The next class time we used our sketch and began to build a three dimensional paper mask. We discussed how to make a symmetrical shape by folding the paper and cutting on the fold. The shape of the mask was made this way. See belowIn order for the mask to be three dimensional students had to cut a V at the bottom.


Using glue they glued the V together to make the mask pop out.


Once mask was dry student began cutting shapes for the eyes, mouth, nose. There were a couple of art concepts that I looked for in each mask. Mask had to be symmetrical, not just balanced "The mirror image" Shapes had to be identical. They had to fold the paper in half and draw one shape to make multiples. Also at least one shape inside had to symmetrical. Example the noses.


Students were encouraged to have some shapes pop out. Also layering colors added creativity to the masks. Some students did a great job at both of the these. See below.

The final day we discussed "breaking the edge" of the masks. This could be accomplished creating hair, a beard, shapes that went out for horns, ears, etc. With this I demonstrated how to zig zag, curl the paper. These projects turned out great! They made interesting displays on a bulletin board outside the art room and in a display case.