Showing posts with label Kindergarten. Show all posts

Friday, May 16, 2014

Literacy in Art

Since I have been back I have really been focusing in my younger grades, literacy. Student's love to listen to stories and create a work about it. In the second grade classrooms they have been learning about how to positively effect an environment. Mrs. Rumphis is such a great story to illustrate that. I saw this lesson on again Fine Lines blogspot. You can find her lesson here.

This was a two day lesson for us. here are some of our examples.


Kindergarten: If the Dinosaurs Came Back to my Town
Where I found this idea. http://elementaryartroom.blogspot.com/


First Grade: Arlo Needs Glasses. One day Art Lesson. Found this idea here
This past week several first graders in my class wear glasses, so they thought this lesson was so cool. Just like the story says, Glasses Rock!


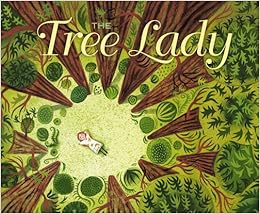
This is a lesson I am also doing with Second after Mrs. Rumphis. From the book "The Tree Lady". Their classes are starting a unit with the book next week. I love how it can all connect. 

 and just one example. I will post more later.
I got this idea from here

Friday, May 9, 2014

Kindergarten Pattern Zebras

This is one of my favorite lessons of the year. I got the idea from artsonia. I have created my own template of shapes the students cut out to create the shape of the zebra, except the head.  I pre cut those out of colored construction paper. This lesson requires some work before hand. Such as precutting shapes for head, stripes in two sizes for body and legs and yarn for mane and tail. My classes our 50 minutes, so it took two days. The first day we talk about pattern, I read them a book and we do a smart board activity together on simple patterns, Ab, ABC, AAB, ABB, etc. We used small beads for nostrils, for more of a mixed media look. 


Thursday, February 21, 2013

Kindergarten's Cool Jellies!

MOST ADORABLE LESSON YET!!!
In Kindergarten we are learning all about color.
We have already discussed warm colors with  our scribble sun  lesson and I wanted to do a lesson on cool colors as well. I found this lesson on Pinterest, from Mrs. Knight's Smartest Artists blog. This lesson took three class times. I really wanted it to take two but it was just too much. I decided to let my time line go and just let the kids take their time with cutting and punching holes. It was worth the wait.

First Day
Discussion of cool colors, what they are, what that means, and examples on works of art.
Cool wavy painted lines

Second Day: Book
"I'm the best artist in the Ocean" by Kevin Scherry
cut semi oval for jelly fish body and use scrapbook scissors and hole punchers for legs/glue on paintings. This took forever! Kids had difficult time with punchers but got the hang of it. They rallied through it!  This part carried us into the next class time.

Third Day:
Smart board activity. Where kids had to sort and drag colors into warm and cool groups.
Finish up legs, the more the better. Eyes with white pre cut circles (i made from my cricut) and hole punched eye balls. A mouth, name in back ground and stamped light blue bubbles from the top of a cup. 
As you can see some of these are without a mouth! One or two classes I just ran out of time at the end of class and we left them so. No problem...still super cute. 


This one looks as if he is floating!


One of my favorites. This one is hung outside my class room  door in a frame. 
Adorable!


Scrap book scissors and hole punchers! This little girl below is actually cutting a zig zag on her own! You go girl!


Thursday, January 24, 2013

Kindergarten Roller Coasters


 An Oldie but Goodie! I'm adding this lesson because it is so great. These are photos from the third day of Kindergarten months ago. This group of Kinders really were super at bending, folding, curling the paper. At the end of class most of that class had color exploding off their paper. So much fun. For more details about this lesson click here  http://www.blogger.com/blogger.g?blogID=7066642072576014944#editor/target=post;postID=7007039604688088204.


Tuesday, November 15, 2011

Kindergarten Initial Paintings


Great 2 day lesson on the letter recognition, shapes, lines, and intro to painting.


This lesson I have actually borrowed from the teacher I student taught with over 10 years ago. I haven't done it in a long time and thought it would be a great one for my kindergartners this year.

It is a great lesson to introduce painting. We discuss so many things with lesson such as how to hold a paint brush, how to wipe the brush, how to get paint and carry it back to their seats (see photo at bottom on how I set up paint in room), how to carry a wet painting to the drying rack, etc. Also we practice lines, shapes, and I introduce the concept of outlining. So many times kids first start painting the inside the of the shape first. Outlining keeps the shape of the letter and helps students to stay inside the lines of the shape.


This lesson is a little time consuming for me because I draw their initial first before hand in pencil. To start the lesson I ask them why do they think they have that particular letter. Then we talk about what an initial is.


First day:

We discuss all the basics with the brush, paint, etc. This takes a while.

out line and paint the letter one color. Then they can pick a line for the top and another for the bottom of the paper. I have the lines written on the board.


Second Day:

when they walk in the room I give them a card with one shape on it. We used triangles, circles, squares, ovals, and rectangles. We talked about the shapes and how they would use their shape five times in their letter, and the shape had to be the same size as the their shape in the card. Very helpful because they usually paint either super large or too small and would fill their letter with a thousand shapes.


They outlines their letter with another color. If their letter was a light color they needed to use a dark color for their outline. If the letter was a dark color they needed to use to use a light color for the outline. This adds contrast. Some got that concept, some did not.


Then they could use additional lines across the paper going behind the letter.


Student chose one color at a time. They pick it up behind the magic line and put it back behind the magic line. This picture is from last year. This year the table is in the middle of the room and the line and paints go all the way around the table.