Second Graders had fun learning about the life and work of Claude Monet and looked at several of "Japanese Bridge" paintings. We discussed En Plein Air, and how to paint like an impressionistic artists. Student's looked one of his paintings on the smart board, and mixed and used similar colors (blue, green, light blue,yellow) by quickly dabbing the colors. Bridges were made first with painters tape. See pics below.
The next class time tape came off and we studied what water lilies looked like in real life and how differently Monet painted them. They were carefully painted with a palette of red, purple, pink and green. The last thing was to add a shadow on bridge with gray paint.
Showing posts with label painting. Show all posts
Thursday, July 25, 2013
Sunday, April 8, 2012
First Grade Cities


After returning from a trip to NYC in January I did this project with my first graders. The straight lines for the buildings were printed with cards and black tempra. The following art time lines were drawn with oil pastel and then a water color wash. This project really lasted three 40 minute classes.Tuesday, January 10, 2012
Gesture Drawing
Great 1 (50 minute class) or a 2 day project, depends on how detailed the wash is and how many gestures they draw. A fellow art teacher in the county gave me this idea years ago, and it rocks! Thanks Martha.
We do a lot of drawing lessons in art in 5th grade. This is a great beginner lesson on gesture drawing.
I put a wooden mannequin on each table in a different pose, that I have already made, and a basket of oil pastels. Students get 2 minutes to draw their mannequin. I demonstrate this first.
When time is up they move clock wise to the next table. 2 minutes again, with that gesture. I do ask the kids to turn their papers each time they move tables to get a different direction for the mannequin. If I don't they will draw all 6 in nice neat little rows, however some still do.
Also I do encourage overlapping and running the shapes off the paper for a great composition.
Students keep moving around to each table drawing for 2 minutes each, until they have completed 5. Then I, or I choose a student, to stand for 2 minutes in a pose (see picture) for students to sketch as well. They are to do this in shapes as well.
I do have 7 tables, and sometimes if time permits and space on their papers they do all 7 poses.
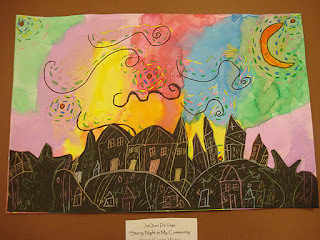
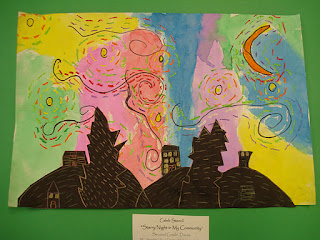
Water color wash on top. I think I let this class choose 4 colors, some did 5. Usually I make them pick a color scheme such as primary, secondary, warm, cool, analogous, etc. This day I didn't.
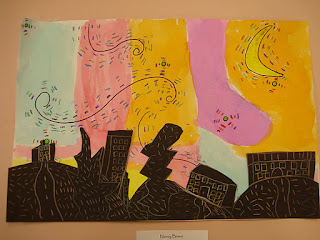
Tuesday, December 6, 2011
Starry Night in my Community


In their classrooms second graders learn about their community. I thought this would a great lesson to tie in a little art history and what they are working on in their rooms. This lesson is from, http://pantherspalette.blogspot.com/2011/02/2nd-grade-starry-night-paintings.html. She does a great job discussing the project and how to begin. I did not have the metallic markers, so we used metallic colored pencils instead. Both Ithink work great.
This lesson was done in about three days. I have 40 minute classes.
Students learned all about the life and work of Vincent Van Gogh, especially his painting "Starry Night". We discussed landmarks in our community such as, our school, fire departments, stores, neighborhoods, farms, office buildings, etc. these were drawn in metallic pencils. We also really talked about his use of dashes of color to show movement.
Tuesday, November 15, 2011
Kindergarten Initial Paintings


Great 2 day lesson on the letter recognition, shapes, lines, and intro to painting.
This lesson I have actually borrowed from the teacher I student taught with over 10 years ago. I haven't done it in a long time and thought it would be a great one for my kindergartners this year.
It is a great lesson to introduce painting. We discuss so many things with lesson such as how to hold a paint brush, how to wipe the brush, how to get paint and carry it back to their seats (see photo at bottom on how I set up paint in room), how to carry a wet painting to the drying rack, etc. Also we practice lines, shapes, and I introduce the concept of outlining. So many times kids first start painting the inside the of the shape first. Outlining keeps the shape of the letter and helps students to stay inside the lines of the shape.
This lesson is a little time consuming for me because I draw their initial first before hand in pencil. To start the lesson I ask them why do they think they have that particular letter. Then we talk about what an initial is.
We discuss all the basics with the brush, paint, etc. This takes a while.
This lesson is a little time consuming for me because I draw their initial first before hand in pencil. To start the lesson I ask them why do they think they have that particular letter. Then we talk about what an initial is.
First day:
We discuss all the basics with the brush, paint, etc. This takes a while.
out line and paint the letter one color. Then they can pick a line for the top and another for the bottom of the paper. I have the lines written on the board.
Second Day:
when they walk in the room I give them a card with one shape on it. We used triangles, circles, squares, ovals, and rectangles. We talked about the shapes and how they would use their shape five times in their letter, and the shape had to be the same size as the their shape in the card. Very helpful because they usually paint either super large or too small and would fill their letter with a thousand shapes.
They outlines their letter with another color. If their letter was a light color they needed to use a dark color for their outline. If the letter was a dark color they needed to use to use a light color for the outline. This adds contrast. Some got that concept, some did not.
Then they could use additional lines across the paper going behind the letter.
Subscribe to:
Posts (Atom)


