Tuesday, December 6, 2011

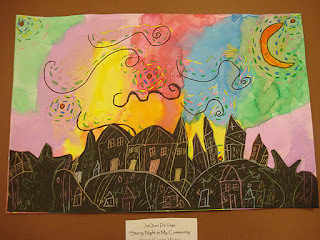
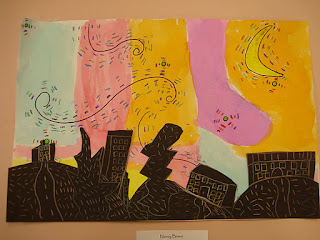
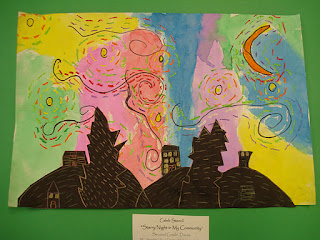
Starry Night in my Community


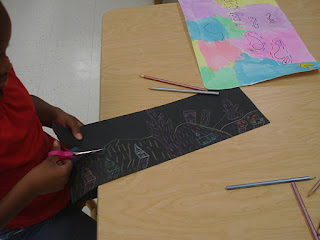
In their classrooms second graders learn about their community. I thought this would a great lesson to tie in a little art history and what they are working on in their rooms. This lesson is from, http://pantherspalette.blogspot.com/2011/02/2nd-grade-starry-night-paintings.html. She does a great job discussing the project and how to begin. I did not have the metallic markers, so we used metallic colored pencils instead. Both Ithink work great.


This lesson was done in about three days. I have 40 minute classes.


Students learned all about the life and work of Vincent Van Gogh, especially his painting "Starry Night". We discussed landmarks in our community such as, our school, fire departments, stores, neighborhoods, farms, office buildings, etc. these were drawn in metallic pencils. We also really talked about his use of dashes of color to show movement.


Great job second graders! Love these.


Tuesday, November 15, 2011

Kindergarten Initial Paintings


Great 2 day lesson on the letter recognition, shapes, lines, and intro to painting.


This lesson I have actually borrowed from the teacher I student taught with over 10 years ago. I haven't done it in a long time and thought it would be a great one for my kindergartners this year.

It is a great lesson to introduce painting. We discuss so many things with lesson such as how to hold a paint brush, how to wipe the brush, how to get paint and carry it back to their seats (see photo at bottom on how I set up paint in room), how to carry a wet painting to the drying rack, etc. Also we practice lines, shapes, and I introduce the concept of outlining. So many times kids first start painting the inside the of the shape first. Outlining keeps the shape of the letter and helps students to stay inside the lines of the shape.


This lesson is a little time consuming for me because I draw their initial first before hand in pencil. To start the lesson I ask them why do they think they have that particular letter. Then we talk about what an initial is.


First day:

We discuss all the basics with the brush, paint, etc. This takes a while.

out line and paint the letter one color. Then they can pick a line for the top and another for the bottom of the paper. I have the lines written on the board.


Second Day:

when they walk in the room I give them a card with one shape on it. We used triangles, circles, squares, ovals, and rectangles. We talked about the shapes and how they would use their shape five times in their letter, and the shape had to be the same size as the their shape in the card. Very helpful because they usually paint either super large or too small and would fill their letter with a thousand shapes.


They outlines their letter with another color. If their letter was a light color they needed to use a dark color for their outline. If the letter was a dark color they needed to use to use a light color for the outline. This adds contrast. Some got that concept, some did not.


Then they could use additional lines across the paper going behind the letter.


Student chose one color at a time. They pick it up behind the magic line and put it back behind the magic line. This picture is from last year. This year the table is in the middle of the room and the line and paints go all the way around the table.


Thursday, November 10, 2011

Fall Leaf Prints/Bulletin board


This is a very successful art lesson. I know most of us have tried it, or do it already. I did it last year with third grade and found it too easy for them, so this year tried it with first grade. We did it in one class period which is a bonus for me since time is an issue for me with my schedule.


I only used 12x9 size paper this year, which I think made it possible for the students to finish quickly. Another new try this year was using a brayer instead of painting this leaves white.


Here is a quick list of materials and directions:


12x9 black construction paper

different size leaves (i found the maple leaves to be the best)

brayer

white tempera paint

sponges

red, yellow, and orange paint


1.roll the backside of the leaf (which all the veins and texture are) with white paint until it is covered.

2. print on black paper once or twice. sometimes the students were able to print twice to make a "ghost print"

3. encourage to print off the paper to add creativity.

4. print leaf many times.

5. with sponges print fall colors for background.


I hung these throughout the school. this bulletin board is a small on outside my room. The "printed" turkey makes a cute addition.


Sunday, November 6, 2011

Tint and Shade with a Cherry on Top


I have to admit that I am a big "borrower" of art lessons and yes bulletin boards. This particular art lesson I started last year with first grade, and made some minor changes for this year. Last year I first saw this lesson on http://ourartlately.blogspot.com/2011/05/i-scream-you-scream.html. This year I found a blog, and I can't remember which one, with a cute bulletin board of these. So I am borrowing this cute title..tint and shade with a cherry on top. Hopefully I can find this blog again so I can add that to this post.

This is a great two day project. We discussed value, tint, shade, and value scale. Each table had a different color (2 palettes one for tint and one for shade) and they worked together mixing.


I had paper cut and folded into four sections. The top was for the original color and two for tint and one for shade. They cut out a triangle from a template and painted that the darkest shade. Some classes did brown cones instead of color cones.


The last day they cut out their scoops with a template that I had made and glued on top of their cone to make a value scale. The lightest tint on top. Then they decorated their ice cream cone with a cherry (pom pom) and sequins for the sprinkles. We also drew black lines on the cones to look more realistic.


This nine weeks when I do this project again with the other set of first graders. I think we will make more scoops (values) to make these taller, with a brown cone. Ill post results later.


Friday, October 28, 2011

Ghost Eye Tree, Tint and Shade


I really like to teach at least one color lesson per grade level. For third grade I always create a lesson on value. This lesson I found on http://kids-finelines.blogspot.com/2010/10/ghost-eye-tree.html. It it great for this time of year. It is based on the story "Ghost Eye Tree" by Bill Martin. I actually read the entire book to my third graders, but had to replace certain words like stupid and dumb with silly and crazy.


The first day I read the story and then we experimented with color. I gave each table a palette of blue and white. Students painted a circle white for the moon first.


Then I added blue to the white students mixed to create a light tint. This tint went around the moon.


Next more blue was added to make a darker tint. This went around the moon again.


The original "True" blue was added around and around the moon after the tints.


For the first shade I added a little black to the blue in the palette. Students mixed. This was painted next.


Finally I added more black to make the blue the darkest shade. This was used on the rest of the paper.


On the second day we created the tree with black construction paper. I actually have no photos for this step. You can follow the above blog for more directions on how to teach the tree.


These turned out really great. Quick,easy, fun two day lesson. Next nine weeks I have a different set of third graders and will need to teach value to them. I'm planning a different lesson for them, since this one to me is more seasonal.


Monday, October 24, 2011

Ancient Greek Pottery

With this lesson we discussed how these pots were an important part of the life of ancient Greeks. Not only were they used functionally, but they were beautifully decorated with patterns and stories of mythology, Olympic games, etc.

We looked at examples of the Krater, Amphora, and Klix. Students were to chose one and draw half the shape on a brown paper bag folded in half. When they cut out the shape it would be symmetrical. The handles were a difficult concept with the hole inside. I really had to demonstrate that carefully.

Patterns of shapes and lines were drawn across pot and in the handle. Some students also drew figures moving to tell a story. We also saw and discussed black and red style pottery and how both were achieved.

We used black markers for our decorations and patterns. These were mounted on construction paper.